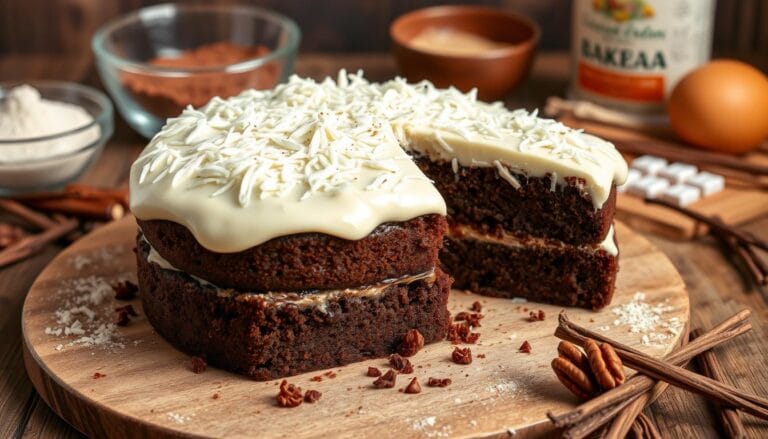
How to Make Homemade Christmas Tree Cakes: Easy Recipe & Tips
As winter arrives, the air is filled with holiday magic. Baking homemade Christmas tree cakes is a beloved tradition. These treats not only delight but also bring people together, creating warm memories.
This guide will help you make your own festive Christmas tree cakes. You’ll learn how to make the perfect cake batter and decorate it beautifully. You’ll be amazed at how a simple sponge can become a stunning centerpiece.
Table of Contents
Key Takeaways
- Discover the easy-to-follow recipe for homemade Christmas tree cakes
- Learn essential tips and techniques for baking the perfect holiday dessert
- Explore creative ways to decorate your Christmas tree cakes for a professional touch
- Uncover storage and make-ahead tips to ensure your cakes stay fresh and flavorful
- Troubleshoot common issues and find solutions to common Christmas tree cake problems
Understanding the Magic of Christmas Tree Cakes: A Holiday Tradition
The charm of yule log cakes and other tree-shaped treats is a holiday favorite. These desserts come from ancient traditions. They turn the Christmas tree into a tasty centerpiece that excites our senses.
Origins of Tree-Shaped Desserts
The yule log cake, or bûche de Noël, dates back to ancient times. It started as a wooden log to celebrate the winter solstice. This symbolized life’s renewal and the sun’s return in the darkest time. Now, it’s a tasty, log-shaped cake we all enjoy.
Why These Cakes Make Perfect Holiday Treats
- Festive Presentation: Christmas tree cakes are a beautiful sight. They’re great as a holiday gathering centerpiece.
- Seasonal Flavors: These cakes have seasonal flavors like gingerbread and peppermint. They truly capture winter’s spirit.
- Versatility: From traditional yule log cakes to creative designs, these desserts fit many holiday tastes and diets.
Baking a traditional yule log cake or trying new christmas baking ideas adds magic to your holiday. These whimsical desserts are a must-have for any festive celebration.
Essential Ingredients and Equipment for Your Christmas Tree Cake
Making a Christmas tree cake is all about the right ingredients and tools. From the cake batter to the decorations, the right equipment makes a big difference. Let’s look at what you need to make your holiday cake a hit.
Key Ingredients for a Christmas Tree Cake
- Flour (all-purpose or cake flour)
- Sugar (granulated or brown)
- Butter (unsalted, room temperature)
- Eggs (large, at room temperature)
- Baking powder and baking soda
- Salt
- Milk or buttermilk
- Vanilla extract
- Seasonal flavors (such as peppermint, eggnog, or cinnamon)
Necessary Equipment for Baking and Decorating
- Tree-shaped cake pan or multiple round cake pans
- Mixing bowls (various sizes)
- Hand mixer or stand mixer
- Offset spatula and piping bags
- Turntable or lazy Susan (for decorating)
- Decorating tips and piping bags
- Food coloring (gel or liquid)
- Edible glitter, sprinkles, and other festive toppings
With these ingredients and tools, you’re ready to make a beautiful Christmas tree cake. It will wow your family and friends. Remember, preparation is key. Make sure you have everything before you start baking.
| Ingredient | Purpose |
|---|---|
| Flour | Provides structure and texture to the cake |
| Sugar | Sweetens the cake and contributes to its texture |
| Butter | Adds richness and flavor to the cake |
| Eggs | Bind the ingredients together and contribute to the cake’s structure |
| Baking powder and baking soda | Leavening agents that help the cake rise and achieve a light, fluffy texture |
| Salt | Enhances the overall flavor of the cake |
| Milk or buttermilk | Adds moisture and tenderness to the cake |
| Vanilla extract | Provides a classic, aromatic flavor to the cake |
| Seasonal flavors | Infuse the cake with festive, holiday-inspired notes |
“The key to a successful Christmas tree cake lies in the preparation. Gather all the necessary ingredients and equipment, and you’ll be well on your way to creating a true holiday masterpiece.”
Preparing the Perfect Cake Batter for Your Holiday Masterpiece
Making the perfect cake batter is key for a great Christmas tree cake. This section covers how to measure and mix, and adds festive flavors. Follow these tips for a holiday baking success.
Measuring and Mixing Techniques
Accurate measurements are essential in baking. Always follow the recipe and use the right tools like measuring cups and spoons. When measuring dry ingredients, gently spoon them into the cup without packing.
For wet ingredients, pour slowly and level off the top. This ensures you get the right amount. When mixing, be gentle to avoid a dense cake.
Adding Seasonal Flavors
Christmas baking is a time to try festive flavors. Add spices like cinnamon, nutmeg, or peppermint to your batter. Vanilla or almond extract can also enhance the taste.
Don’t be afraid to add dried cranberries, chopped walnuts, or orange zest. These ingredients bring the holiday spirit to your cake.
Temperature Control Tips
Controlling the oven temperature is vital for a perfect cake. Preheat your oven to the right temperature and check with an oven thermometer. When adding the batter, avoid opening the oven door too often.
This helps prevent the cake from sinking. Keep an eye on the baking time and use a toothpick to check if it’s done.
By following these tips, you’ll make a holiday cake that will wow your guests. Your home will smell amazing, filled with the scent of Christmas baking.
Step-by-Step Guide to Baking Your Christmas Tree Cake
Baking a Christmas tree cake is simpler than you might think. Just follow a few easy steps to make a festive holiday dessert. This will wow your family and friends. Let’s start baking your christmas tree cake.
First, heat your oven to 350°F (175°C). Grease and flour a bundt or tube pan to help the cake come out easily. You can also use a square or rectangular pan and cut it into a triangle later.
- In a large bowl, mix the dry ingredients – flour, baking powder, and salt – together.
- In another bowl, cream the butter and sugar until it’s light and fluffy. Add the eggs one at a time, then the vanilla extract.
- Slowly add the dry ingredients to the wet ingredients, mixing just until they’re combined. Avoid overmixing to keep the cake light and fluffy.
- Pour the batter into the prepared pan and bake for 45-55 minutes. The cake is done when a toothpick inserted in the center comes out clean.
- Let the cake cool in the pan for 10-15 minutes. Then, flip it onto a wire rack to cool completely.
After your christmas tree cake cools, it’s time to decorate. Look out for the next section. We’ll show you how to make the perfect buttercream frosting and shape your holiday dessert.
“Baking is like painting with ingredients. I try to let the natural flavor of each ingredient shine through in my cakes.”
Creating the Perfect Buttercream Frosting for Decorating
The buttercream frosting is key for decorating your Christmas tree cake. It’s smooth and sweet, making your holiday treat even more special. We’ll show you how to make the perfect buttercream frosting for your Christmas baking.
Color Mixing Guide
To get the perfect green for your Christmas tree, you need to mix colors well. Start with American-style buttercream and add green food coloring slowly. Mix well after each addition until you get the right shade. Try different greens to make your tree look real.
Remember, a little food coloring goes a long way. Add it slowly and taste the frosting as you go. This way, you can keep the flavor balanced.
Frosting Consistency Tips
The frosting’s consistency is important for piping and decorating. It should be thick enough to hold its shape but still smooth. To get the right consistency, watch the temperature and the butter to powdered sugar ratio.
If the frosting is too soft, chill it in the fridge for a few minutes. If it’s too stiff, warm it up by placing the bowl in hot water. Stir continuously until it’s right.
With these tips, you’ll make a stunning buttercream-frosted Christmas tree cake. It will impress your guests and become a holiday tradition.
Professional Tips for Shaping Your Christmas Tree Cake
Making a perfect christmas tree cake needs skill and technique. As a pro baker, I’m excited to share my best tips. You’ll impress your guests with a holiday baking masterpiece that’s sure to wow.
Achieve the Ideal Tree Silhouette
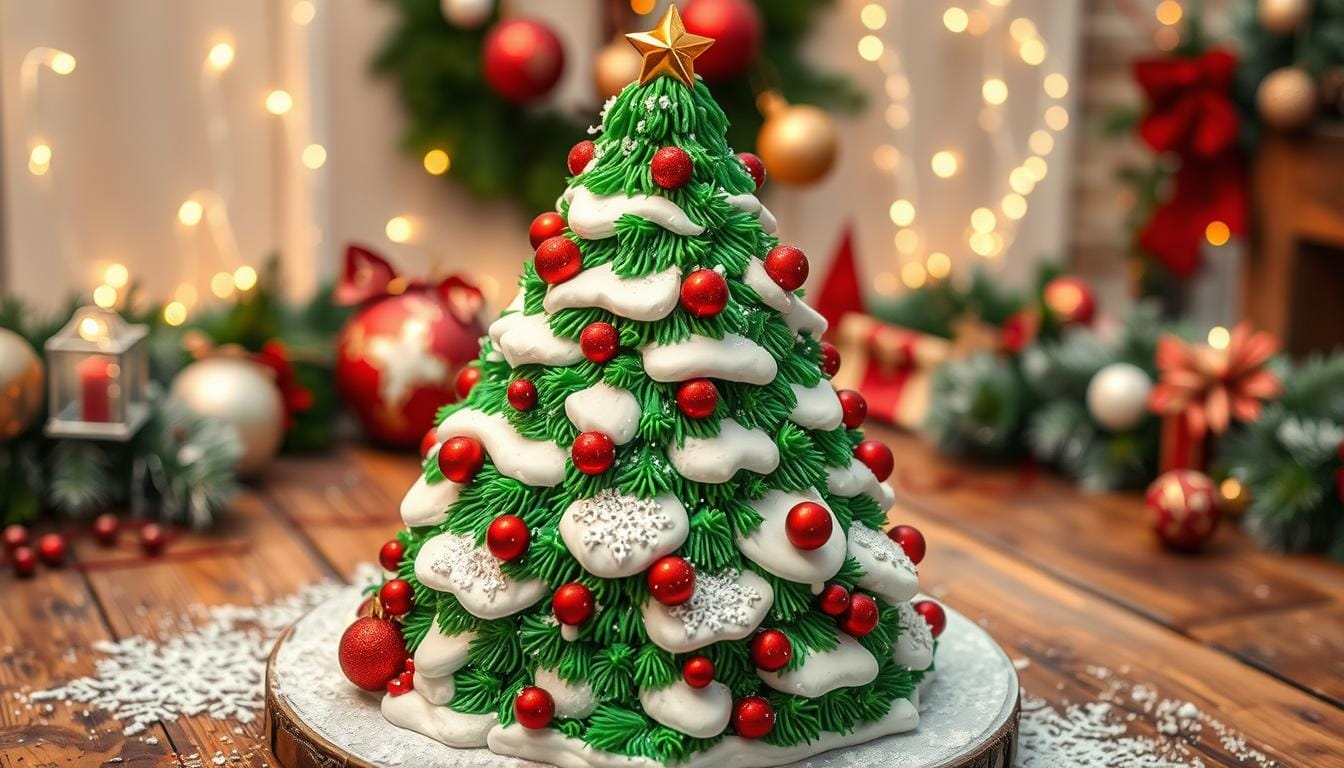
The secret to a real-looking christmas tree cake is in the shaping. Start by baking layers in sizes that get smaller as you go up. This makes the classic triangular tree shape. After the cakes cool, use a serrated knife to carve and trim them for a clean, symmetrical look.
- Bake cake layers in graduated sizes, from widest at the base to narrowest at the top.
- Use a serrated knife to carefully carve and trim the layers, creating a clean, symmetrical tree shape.
- Consider using dowel rods or skewers to provide structural support as you stack the layers.
Smooth and Sculpt the Cake
Now, smooth and sculpt your christmas tree cake to perfection. First, apply a crumb coat of buttercream frosting. Then, use a spatula or cake scraper to refine the tree’s contours and angles. Focus on the tapered top and rounded branches for a natural look.
| Technique | Description |
|---|---|
| Crumb Coat | Apply a thin layer of buttercream frosting to create a smooth, even surface. |
| Sculpting | Use a spatula or cake scraper to refine the contours and angles of the cake, creating a realistic tree shape. |
With these tips, you’ll make a stunning christmas tree cake that will be the highlight of your festive dessert table. Happy baking!
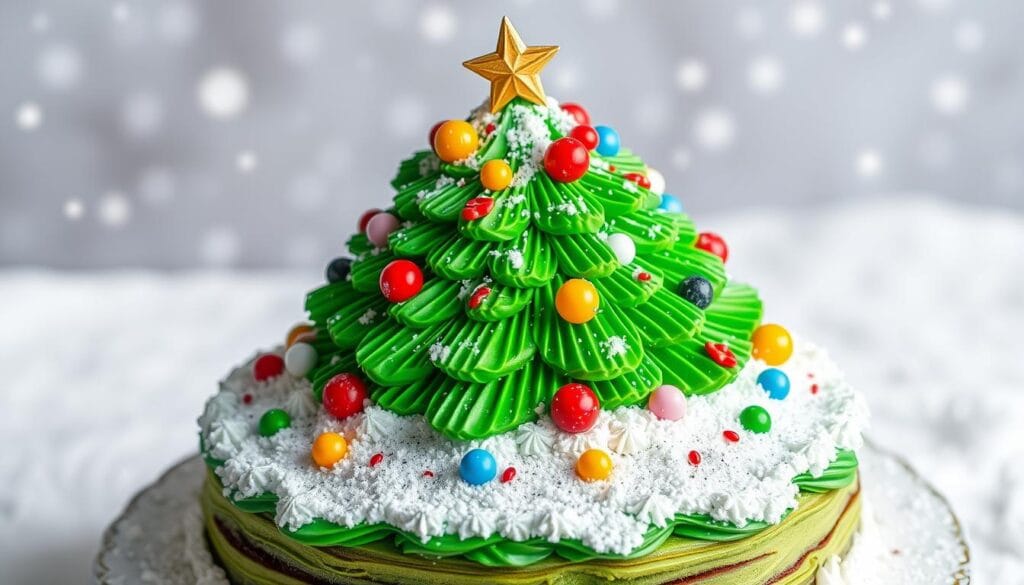
Decorating Techniques to Make Your Christmas Tree Cake Stand Out
Turn your holiday dessert into a winter wonderland with these decorating tips. Whether you want a classic look or something modern, the right decorations can make your Christmas tree cake shine.
Working with Fondant
Fondant is great for making detailed decorations for your cake. You can shape it into ornaments, presents, or small trees. With practice, you can make all sorts of shapes to make your cake look magical.
Adding Edible Sparkle
Use edible glitter or luster dust to make your cake sparkle. These decorations reflect light and add a magical touch. Try different colors and ways to apply them to get the sparkle you want.
Creating Texture Effects
Add texture to your cake to make it look like a real Christmas tree. Use a knife or piping bag to create tree bark-like ridges. Or, press shredded coconut or crushed cookies into the frosting for a snowy look. These textures add depth and realism to your cake.
With these techniques, you can turn a simple cake into a holiday masterpiece. Let your creativity shine and make a dessert that’s as stunning as it is tasty.
Storage and Make-Ahead Tips for Your Holiday Dessert
Making a Christmas tree cake is a fun holiday tradition. But, knowing how to store and transport it is key. Follow these simple tips to keep your festive dessert fresh and impressive, even if you make it ahead of time.
Storing Your Christmas Tree Cake
After your cake cools and you’ve decorated it, proper storage is crucial. Here’s what to do:
- Store the cake in an airtight container or wrap it tightly in plastic wrap to prevent drying out.
- If you used buttercream frosting, the cake can stay at room temperature for up to 3 days. Refrigerate it for up to 1 week for longer storage.
- For cakes with cream cheese or whipped cream frosting, refrigeration is necessary to keep the frosting fresh.
- Avoid storing your Christmas tree cake near strong-smelling foods, as it can absorb unwanted odors.
Make-Ahead Tips for Your Holiday Baking
Want to make your Christmas tree cake ahead of time? Here are some tips:
- Bake the cake layers up to 1 week in advance and freeze them, tightly wrapped, until ready to assemble and decorate.
- Prepare the buttercream frosting up to 1 week in advance and store it in the refrigerator. Let it come to room temperature before using.
- Decorate your Christmas tree cake a day or two before serving to allow frosting and decorations to set properly.
With these tips, you can enjoy a beautiful and delicious Christmas tree cake without the stress during the holiday season.
| Cake Component | Storage Duration | Storage Method |
|---|---|---|
| Baked Cake Layers | Up to 1 week | Freeze, tightly wrapped |
| Buttercream Frosting | Up to 1 week | Refrigerate |
| Decorated Christmas Tree Cake | Up to 3 days (room temperature) or 1 week (refrigerated) | Airtight container or plastic wrap |
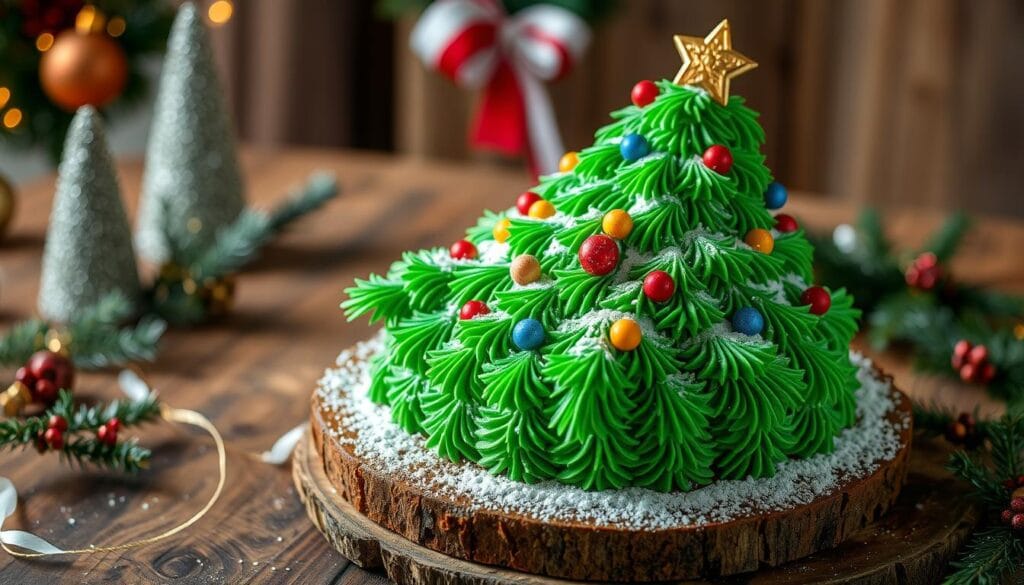
Troubleshooting Common Christmas Tree Cake Problems
Baking the perfect christmas tree cake can be a fun challenge. But, even skilled bakers can run into problems. Don’t worry, we’ve got you covered! We’ll look at common issues and offer solutions to make your holiday baking a hit.
Uneven Baking
If your christmas baking ideas result in a lopsided cake, it might be due to oven temperature issues. Use an oven thermometer to check the temperature. Also, try rotating the cake pan halfway through baking for a more even rise.
Frosting Woes
Getting the frosting just right can be tricky. If it’s too thin, add powdered sugar. If it’s too thick, a bit of heavy cream or milk can help. Frosting should be at room temperature for the best results.
Decorating Dilemmas
Having trouble getting decorations to stick to the christmas tree cake? Make sure the cake is cool before decorating. A thin layer of buttercream or edible glue can help decorations stick better.
With a bit of troubleshooting and a positive attitude, you can conquer any holiday baking challenge. You’ll create a stunning christmas tree cake that will impress everyone!
Conclusion
Making a festive Christmas tree cake is a fun way to celebrate the holiday season. Follow the guide and tips in this article to create a stunning dessert. It will be the star of your holiday gatherings.
Whether you’re an experienced baker or new to it, the key to a great christmas tree cake is mastering the basics. This includes the right cake batter and decorative touches. With the right ingredients and techniques, you can turn a simple cake into a festive dessert that everyone will love.
Start your holiday baking with joy and a willingness to try new things. The fun of making a christmas tree cake is in the personal touches and memories you create. So, get your loved ones together, put on your festive aprons, and let the holiday spirit guide your baking. Happy holidays and happy baking!
FAQ
What makes Christmas tree cakes a popular holiday dessert?
Christmas tree cakes are a favorite holiday treat. They are a beautiful centerpiece for any celebration. Their tree shape and festive flavors make them special.
What equipment and ingredients do I need to make a Christmas tree cake?
To bake a Christmas tree cake, you’ll need a tree-shaped pan and decorating tools. You’ll also need flour, sugar, eggs, butter, and spices like cinnamon or peppermint. Having the right tools and ingredients is key to success.
How do I achieve the perfect cake batter for my Christmas tree cake?
For the perfect cake batter, measure ingredients carefully and add seasonal flavors. Keep the baking temperature right. These steps will help you make a moist, tasty cake.
What are the key steps in baking a Christmas tree cake?
Baking a Christmas tree cake involves a few important steps. First, preheat your oven. Then, prepare the pan and pour in the batter. Finally, check when the cake is done. Follow these steps for a perfect cake.
How do I create the perfect buttercream frosting for decorating my Christmas tree cake?
To make the perfect frosting, get the right consistency and mix colors well. The right frosting will make your cake look like a real tree, with vibrant colors.
What are some expert tips for shaping my Christmas tree cake?
Shaping your cake into a tree needs some skill. Carve the layers and assemble them carefully. These tips will help you create a stunning tree shape.
What are some impressive decorating techniques to make my Christmas tree cake stand out?
To make your cake stand out, use fondant for ornaments and add glitter. Create textured elements to look like tree bark or snow. These touches will make your cake look like a winter wonderland.
How should I store and transport my Christmas tree cake?
Storing and transporting your cake is important. Keep it fresh by refrigerating or freezing it. Use secure containers to transport it, so it stays perfect for your holiday gathering.
What are some common problems I might encounter when making a Christmas tree cake, and how can I troubleshoot them?
Common problems include uneven baking and frosting issues. Learn how to prevent these problems. This way, you can fix them and have a flawless cake.

